Wednesday, March 25, 2020
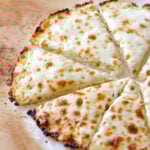
Homemade Egg Noodles
Thursday, March 5, 2020
Instant Pot Pulled Pork
Ingredients
- 1 Tablespoon Packed Brown Sugar
- 2 Teaspoons Paprika
- 2 Teaspoons Garlic Powder
- 2 Teaspoons Onion Powder
- 1 Teaspoon Salt
- 1 Teaspoon Pepper
- 1/2 Teaspoon Cumin
- 1/4 Teaspoon Cayenne, Optional
- 3 Pound Boneless Pork Roast, Cut into 3-4 inch cubes
- 2 Tablespoons Olive Oil
- 1/3 Cup Apple Cider Vinegar
- 2 Cups Barbecue Sauce, Divided
- 1 1/4 Cup Chicken or Beef Broth
- 1 Teaspoon Hot Pepper Sauce, Optional
Instructions
- In a small bowl mix together the brown sugar, paprika, garlic powder, onion powder, salt, pepper, cumin, and cayenne.
- Season the cubed pork with the spice mixture and set aside.
- In a medium bowl whisk together the apple cider vinegar, one cup of the barbecue sauce, the hot pepper sauce if using, and one cup of the broth.
- Turn your instant pot to the saute setting. Add the olive oil and allow it to get hot.
- Add half of the cubed pork to the hot oil and saute for 5 minutes, turning to brown on all sides. Remove the browned pork to a plate and repeat with the remaining half of the cubed pork.
- Turn the instant pot off. Use the remaining 1/4 cup of beef broth and a wooden spoon to deglaze (scrape the brown bits) from the bottom of the pot.
- Add all of the meat along with the barbecue sauce mixture to the instant pot.
- Close the lid and set to sealing.
- Cook on manual high pressure for 40 minutes. Once the cooking time is up, allow the pressure to release naturally for 10 minutes, then do a quick release.
- Remove the meat from the instant pot and shred. Stir in the remaining cup of bbq sauce and serve on buns as desired.
Nutrition
Monday, March 2, 2020
Cauliflower Pizza Crust

★★★★★
4.9 from 101 reviews
How to make THE BEST crispy and tasty low carb cauliflower pizza crust with foolproof step by step video recipe.
- Author: Olena of ifoodreal.com
- Prep Time: 30 minutes
- Cook Time: 30 minutes
- Total Time: 1 hour
- Yield: 8 slices 1x
- Category: Dinner
- Method: Oven
- Cuisine: North American
- 1 medium head of cauliflower (6″ – 7″ wide or 2.5–3 lbs) or 5-6 cups of store bought cauliflower rice
- 1 egg, large
- 1 tsp Italian seasoning (dried oregano or basil)
- 1/8 tsp salt
- 1/4 tsp ground black pepper
- 1/2 cup Parmesan or Mozzarella cheese, grated/shredded
- Cooking spray (I use Misto)*
- Preheat oven to 375 degrees F and line baking sheet with unbleached parchment paper or silicone mat.
- Rinse cauliflower, remove the outer leaves, separate into florets and chop into smaller pieces. Process in a food processor in 2 batches, until “rice” texture forms (skip if using store-bought “rice”). Transfer cauliflower rice on a prepared baking sheet and bake for 15 mins.
- Remove cooked cauliflower rice from the oven, transfer to a bowl lined with a double/triple layered cheesecloth or linen towel, and let cool for 5 minutes. Then squeeze the liquid out of the ball (cauliflower inside the cheesecloth) as hard as you can. Be patient and do this a few times until barely any liquid comes out. Muscle work.:)
- Increase oven temperature to 450 degrees F. In a medium mixing bowl whisk the egg with dried herbs, salt and pepper for 10 seconds. Add cheese and squeezed cauliflower; mix very well with spatula until combined.
- Line same baking sheet with new parchment paper or silicone mat (just make sure to scrape off any bits of cauliflower) and spray with cooking spray. Transfer cauliflower pizza dough in the middle and flatten with your hands until thin pizza crust forms. Make it thicker that in my video, I made it a bit too thin.
- Bake for 20 minutes, carefully flip with spatula and bake for a few more minutes.
- Top cauliflower pizza base with your favourite toppings and bake again until cheese on top turns golden brown.
- Slice and enjoy.
Store: Refrigerate covered for up to 2 days.
Freeze: Tightly wrapped in plastic for 1 month.
Notes
You could cook cauliflower rice in a microwave (I just don’t have one) adjusting time according to your microwave’s abilities (they all differ).
Thursday, February 27, 2020
Instant Pot Shredded Chicken Burrito Bowls
Easy all-in-one dinner Instant Pot Chicken Burrito Bowls have all your favorite ingredients found in a burrito but served in a delicious burrito bowl where you can add all your favorite toppings.
Ingredients
- 3 boneless, skinless chicken breasts
- 2 ¼ cups chicken broth
- 1 packet of taco seasoning
- 15 ounce can sweet corn, drained
- 15 ounce can of black beans, rinsed and drained
- 1 can Rotel (diced tomato and chopped green chilies)
- 1 medium green bell pepper, sliced
- 1 medium red bell pepper, sliced
- 1 medium onion, sliced
- 1½ cups uncooked long-grain rice
Instructions
In the Instant Pot, pour just enough chicken broth to cover the bottom of the pot. Then place the chicken breasts along the bottom of the pot.
Sprinkle the taco seasoning evenly over the chicken.
Pour the corn, black beans, and Rotel into the pot. Try to pour them in different sections of the pot, so everything doesn't pile up in one place.
Add both the green and red bell peppers, and the onion. Again, spreading them evenly along the top, so they don't pile up too much.
Rinse the rice and then add the rice evenly to the pot. Then add the remaining chicken broth. Try to push the rice down so that it's covered by the broth.
Using your Instant Pot's instructions, pressure cook on high for 10 minutes. Once it's done cooking, allow it to slowly depressurize for 10 minutes. Then release the sealing valve to vent any remaining pressure.
Remove the lid. Using 2 forks pull the chicken meat apart so it becomes thin enough for a good taco consistency.
Stir well to incorporate all the ingredients and place the lid back on. Do not turn the Instant Pot on, but let it sit with the lid sealed for at least 5 minutes. This will finish cooking any rice that may have been sitting on the top and not cooked all the way through.
Enjoy in a bowl by itself, in a soft tortilla, or with tortilla chips. And don't forget your favorite toppings!
Recipe Notes
For even more flavor you could add a 4 oz can diced green chiles, add a little cayenne red pepper (to your taste preference) or you could use a package of spicy taco seasoning.
Tuesday, February 11, 2020
3 Envelope Roast
Saturday, February 8, 2020
Pan-Seared Tuna with Avocado, Soy, Ginger, and Lime
Ingredients
2 big handfuls fresh cilantro leaves, finely chopped
1/2 jalapeno, sliced
1 teaspoon grated fresh ginger
1 garlic clove, grated
2 limes, juiced
2 tablespoons soy sauce
Pinch sugar
Sea salt and freshly ground black pepper
1/4 cup extra-virgin olive oil
1 (6-ounce) block sushi-quality tuna
1 ripe avocado, halved, peeled, pitted, and sliced
Directions
- In a mixing bowl, combine the cilantro, jalapeno, ginger, garlic, lime juice, soy sauce, sugar, salt, pepper, and 2 tablespoons of olive oil. Stir the ingredients together until well incorporated.
- Place a skillet over medium-high heat and coat with the remaining 2 tablespoons of olive oil. Season the tuna generously with salt and pepper. Lay the tuna in the hot oil and sear for 1 minute on each side to form a slight crust. Pour 1/2 of the cilantro mixture into the pan to coat the fish. Serve the seared tuna with the sliced avocado and the remaining cilantro sauce drizzled over the whole plate.